Retro console teardown meets audio hacking: turning classic hardware into sonic experiments.
Have you ever wondered what’s inside a Japanese Famicom? Well I did. Particularly what that microphone in controller 2 is like. Luckily, last summer when I was in Japan, I found a “junk” Famicom console for under $6 and, in this video, I break it down to check out what’s going on inside. I open up the controllers and the main system, extract the microphone, and wire it into a custom circuit to hear what it sounds like.
This is part teardown, part audio experiment, and completely perfect for fans of retro tech, DIY audio, and creative sound design.
Can you build a stereo analog distortion box for just $2? Yes, you can! What does it sound like? Well, you’ll need to watch the video for that.
In this video, I put together a simple passive DIY distortion circuit using just 4 diodes, 4 wires, and 4 audio jacks—all dirt cheap but surprisingly effective. This little box works by clipping taking advantage of the diodes’ forward voltage to clip the signal, a classic analog distortion method found in everything from guitar pedals to vintage studio gear. It’s cheap, it’s basic, but listen and see if this might add that grit and warmth that you’re looking for (and, if not, you’d only be out $2).
Following up on my voltage starving conversation with Spectral Evolver a few weeks back, today I’m exploring Blood Cells Audio’s “Mangle“, a Eurorack module that’s basically a voltage-starving VCA, where you can send CV to the op-amps (or insufficient CV to the op-amps to voltage starve them). Here, I try a few different program materials, and show some interesting results of modulating voltage starving over time.
You can check out Spectral Evolver’s voltage-starving Moog gear here:
Talking about voltage starving your audio equipment with Will Klingenmeier.
I sat down for a virtual chat with Will, who has been doing some interesting experiments voltage starving his Moog DFAM and Subharmonicon. Voltage starving is when you intentionally deprive a circuit or device of the full voltage it needs to function, simulating a “dying battery”. The sounds you get are probably not what the manufacturer intended, but definitely an aesthetic worth exploring as you look for new sounds.
In this wide-ranging discussion, we talk about circuit-bending, starving stompboxes, and whether or not this is a good idea with your expensive equipment.
0:00 Introduction 0:30 What is “voltage starving”? 1:08 Voltage starving & circuit-bending 1:54 Voltage starving Moog synths 3:46 How to do it 4:33 Is this dangerous to your equipment? 6:07 Thinking about guitar pedals 8:15 Closing thoughts
I’ve just posted a re-edit of my series introducing circuit-bending old toys (cutting the three-video series down into a more reasonably paced single video). Circuit-bending is the creative customization of consumer electronics with the goal of inventing new unique devices for sound-making, visuals, or other expressive goals.
In this series, now edited into a single video, I take you through my process with some toys from the start, including explorations, experiments, and, importantly, failures. I continue work through transforming this Tinkerbell wand, testing out different resistors and switches to see what I might add to increase its glitchy expressive range.
I’m a composer and sound-designer, not an electrical engineer, so my goal is to find fun sounds that I can use in creative ways (rather than any kind of serious circuit design).
0:00 Intro 0:22 Selecting toys to bend 0:52 Testing with new batteries 1:52 Opening up the Tinkerbell wand 4:42 Opening up the whack-a-mole 7:20 Poking around with test leads 10:40 Recap, equipment 11:11 Examining the components 12:20 Speeding up the clock 14:17 Slowing down the clock 15:19 Varying the clock 18:58 Switches 22:17 The “glitch switch” 24:40 Considering packaging (instrument morphology) 25:19 Tools & equipment 26:15 Updates/Plan 28:32 Installing the “Glitch Switch” 30:48 Installing the Toggle 31:47 Changing the LED 32:47 Installing the Potentiometer 34:17 Adding RCA audio out 35:18 Putting it back together 36:08 Esoteric Etude 38:31 Closing
More circuit-bending and handmade electronic music here:
I circuit bent a Sega Genesis for MIDI-controlled glitch visuals. I can hook it up to a DAW or MIDI sequencer and then glitch out a game in sync with music.
I put this together a few years ago, but had some questions about it, so I cracked open the game system to show how it works. All I’ve done is set up some places to short out the VRAM, where the Genesis stores the sprites for the graphics. Then I added an Arduino to control when it short them out (triggered by MIDI).
Keep in mind that not all Genesis systems are the same, they have different board revisions, so your Genesis might have things in different places.
I’ve put together a three-part series on getting started with circuit-bending, from the initial testing and opening up toys to completed alien instrument.
(Part 3 coming next week)
Circuit-bending is the creative customization of consumer electronics with the goal of inventing new unique devices for sound-making, visuals, or other expressive goals. I’m a composer and sound-designer, not an electrical engineer, so my goal is to find fun sounds that I can use in creative ways (rather than any kind of serious circuit design).
For more of my creative electronics projects, check out here:
What does it mean to “disobey” technology? Expanding on Ernesto Oroza‘s term “technological disobedience”, let’s think about how we can “think beyond the normal capacities of an object, and try to surpass the limitations that it imposes on itself”, working toward a more personal expression through technology using circuit-bending, hacking, creative coding, 3D printing, and glitch art.
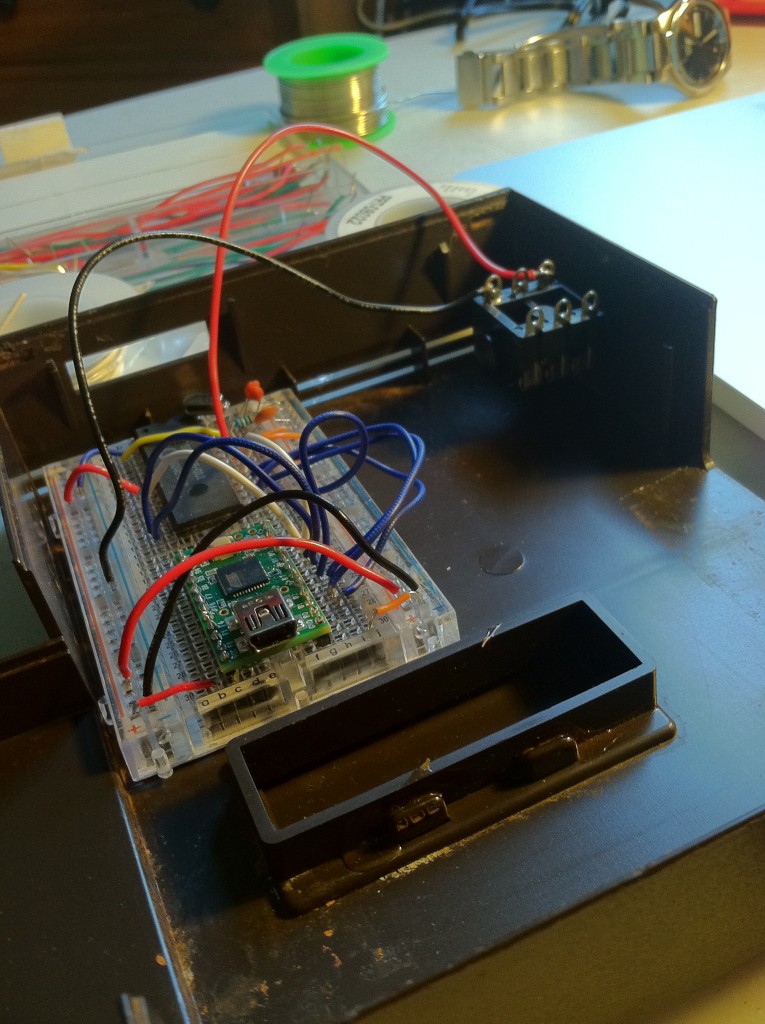
Since last time, I added MIDI control and transferred things to a smaller circuit board (and Arduino) in order to fit everything back in the original case.
Working out how to get the new guts into the old housing
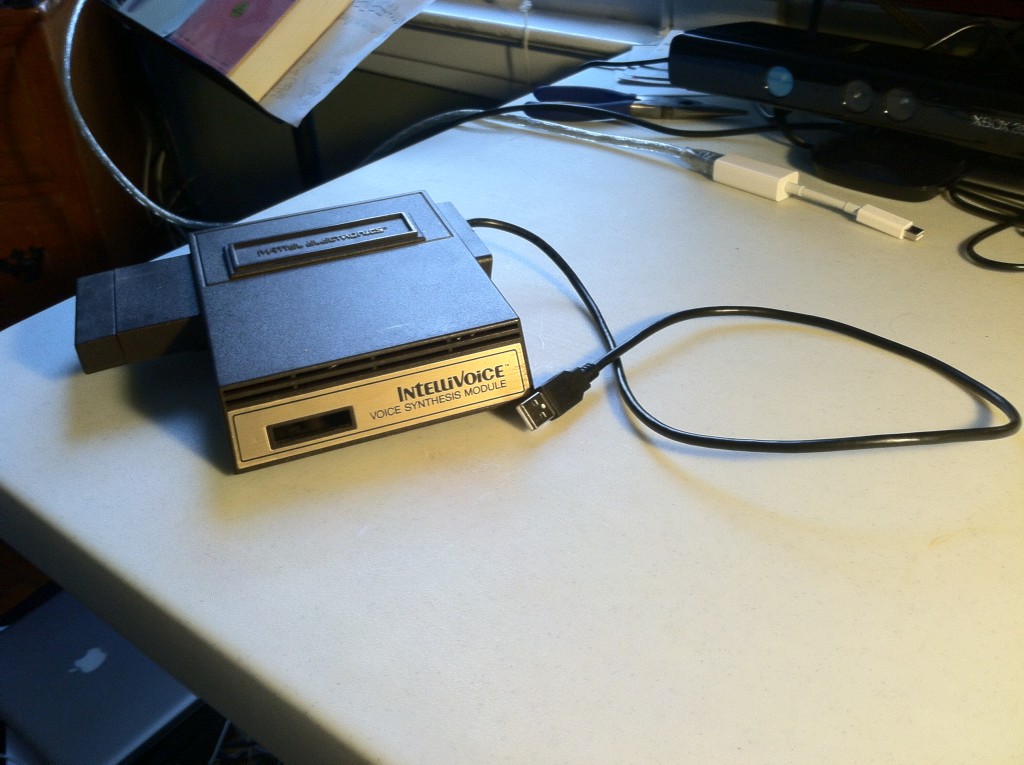
USB MIDI control, 1/4″ output
So what does this little synth do? It takes MIDI notes (from a keyboard or DAW), and uses them to trigger the sounds built in to the Intellivoice chip, which, as it turns out, consist of mostly numbers.
Check it out:
I might look into a few more tweaks. Currently, each word will always play to the end, even if another word is performed before it’s finished. I’m not sure if this is a property of the Intellivoice chip, or something I could fix in my Arduino program.
Why pursue a project like this one?
Games and gaming hardware are mass-produced devices with planned obsolescence and few serviceable parts. By “hacking” and customizing gaming hardware we regain personal ownership of these devices, and we can turn obsolete equipment into performable, expressive instruments.
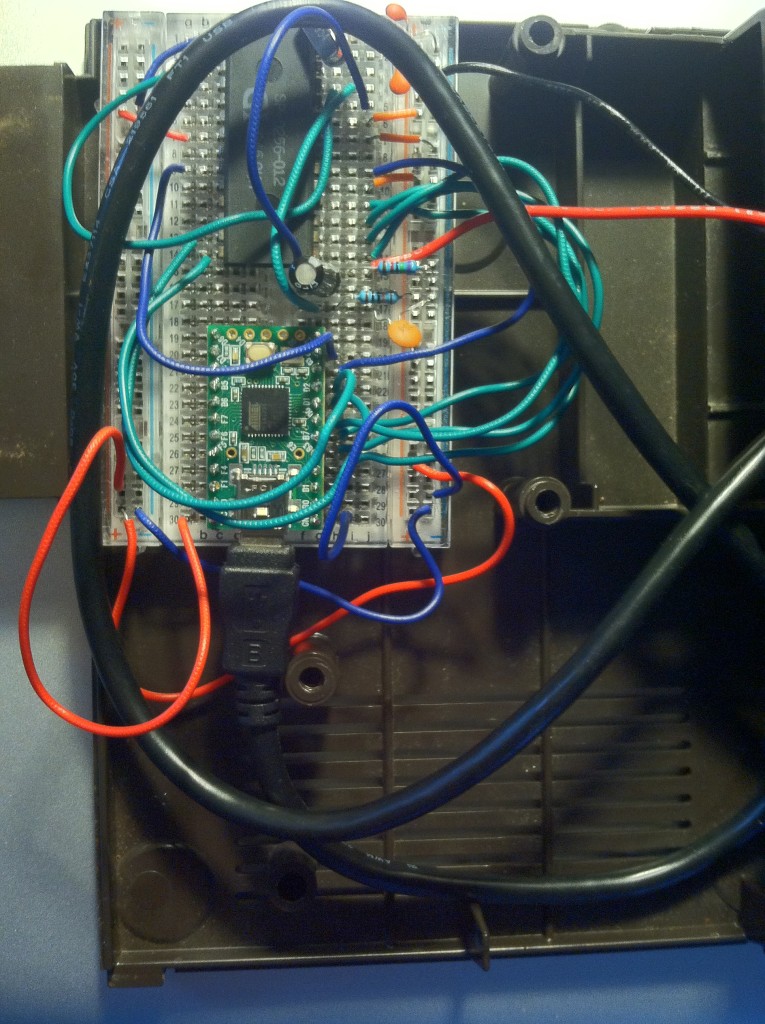
A few last-minute modifications to the audio-chain
An earlier version of this synth actually appears in the electronics of my new commissioned work, Hirazumi (more about the piece here and here), and I think the hacked Intellivoice fits perfectly into the post-digital, cyberpunk aesthetic.